Variable ND Filter Kit for GoPro Hero 13 Black (ND2–32 & ND32–512)
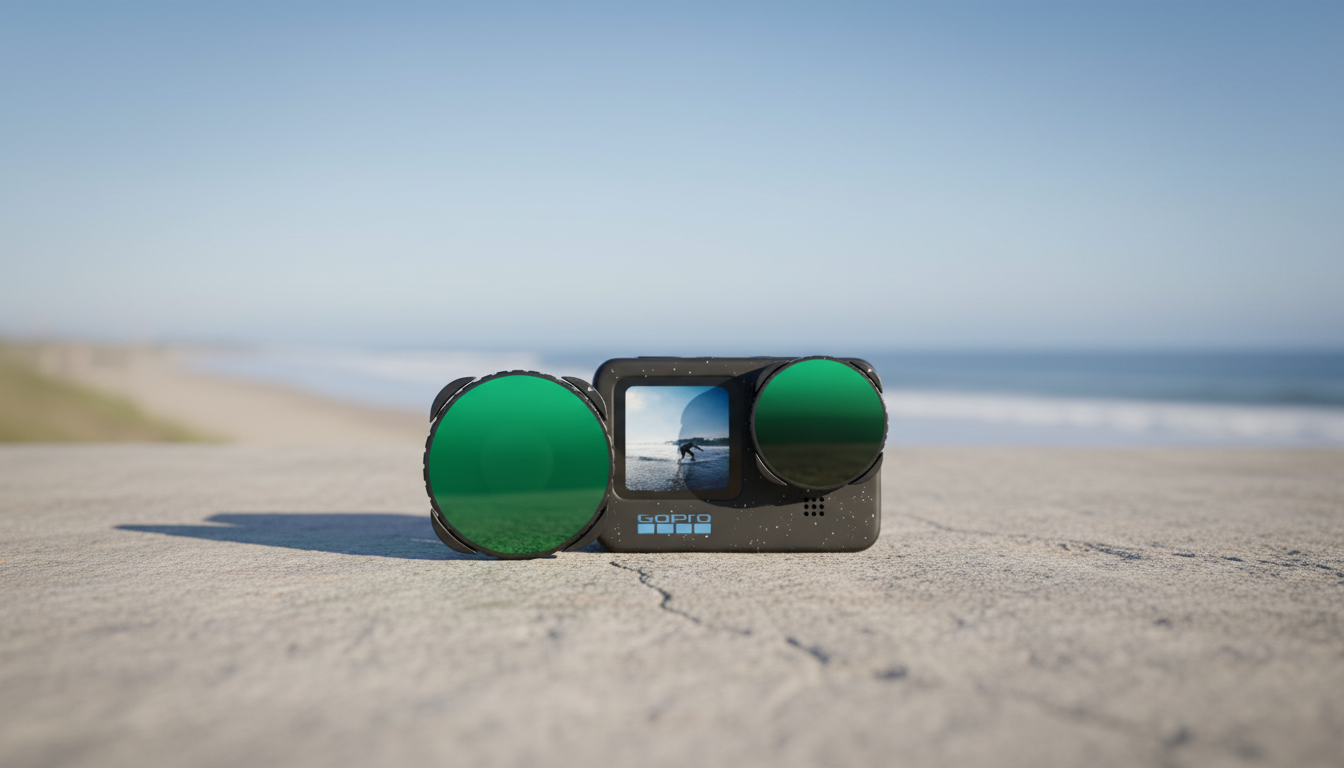
A variable ND filter kit helps control exposure on a GoPro Hero 13 Black without constantly changing shutter speed or ISO. By reducing the amount of light reaching the sensor, it becomes easier to keep natural-looking motion blur for action, smoother video in bright daylight, and longer-exposure effects when the scene is too bright for the camera’s base settings. For more guidance, see Voogoo 52mm ND Fader Filter – Adjustable ND2 To ….
What a variable ND filter does on an action camera
Neutral density (ND) filtration is one of the simplest ways to make daylight footage look less harsh and more natural. On a small, wide-angle action camera, the benefit is immediate: you get more control over shutter speed in situations where the camera would otherwise force extremely fast shutters.
- Reduces incoming light so the camera can use slower shutter speeds in bright conditions.
- Helps maintain consistent motion blur for video (useful for fast movement, panning, and POV footage).
- Can prevent overly “staccato” motion that happens when shutter speed is forced very high in daylight.
- Supports creative looks like motion blur in waterfalls, waves, traffic, or handheld hyperlapse-style clips.
- Variable ND combines multiple strengths in one filter by rotating to increase or decrease density.
If you want a deeper technical overview of ND filtration, helpful references include B&H Explora’s ND filter guide and the general neutral-density filter overview.
What’s included in this kit (two variable ND ranges)
This kit uses a two-range approach: one variable ND for everyday daylight control, and a stronger variable ND for intense glare or longer-shutter effects.
- ND2–32 range for moderate to bright light (roughly 1–5 stops of light reduction).
- ND32–512 range for very bright environments and longer-exposure effects (roughly 5–9 stops).
- Two-range approach covers everyday daylight through extreme glare conditions such as snow, beach, and midday sun.
- Useful as a compact travel solution when carrying multiple fixed ND filters is inconvenient.
ND ranges and practical use cases
| Filter range |
Approx. light reduction |
Best for |
Typical scenarios |
| ND2–32 |
1–5 stops |
Balancing bright daylight while keeping smoother motion |
Morning/afternoon sun, overcast-but-bright skies, outdoor sports, city walk footage |
| ND32–512 |
5–9 stops |
Extreme brightness and longer shutter effects |
Midday sun, beach/snow, reflective water, intentional blur on waves/traffic, bright time-lapse |
When to use ND2–32 vs ND32–512
Choosing the right range is mostly about how bright the scene is and how much motion blur you want. A simple workflow is to start with the lighter range and only step up when you hit the limit of what it can tame.
- Start with ND2–32 for general outdoor shooting; increase density until highlights calm down and motion looks natural.
- Switch to ND32–512 when the scene is still too bright at preferred shutter/ISO, or when aiming for strong motion blur.
- For snow, sand, and water glare, the higher range often becomes necessary earlier than expected.
- If image looks too dark, reduce density first before raising ISO to avoid unnecessary noise.
Getting a clean result: setup and handling tips
Variable NDs are fast to use, but they reward careful setup—especially on action cameras that see a lot of spray, dust, and fingerprints.
- Mount the filter securely and verify there is no vignetting, fogging, or smudges before recording.
- Rotate the variable ND gradually; avoid extreme positions if they introduce uneven density patterns.
- Lock exposure where possible after dialing in density so brightness doesn’t “hunt” during a clip.
- Do a quick test clip and check: highlight detail (sky/water), shadow noise, and motion blur on moving subjects.
- Keep a microfiber cloth handy; fingerprints and salt spray can reduce contrast quickly on action footage.
For camera-specific setup details and firmware-related behavior, GoPro’s official help center is a solid reference: GoPro Support.
Suggested camera settings to pair with an ND filter
ND filters are most useful when you already know the “look” you want. If the goal is smoother motion, use the filter to enable a slower shutter, then keep ISO under control for a cleaner image.
- Aim for a shutter speed that produces natural motion blur (many shooters prefer slower shutters for a smoother look).
- Keep ISO as low as practical after setting the ND density; prioritize exposure control with the filter rather than ISO.
- For fast action where crisp frames matter, use less ND and a faster shutter; for cinematic motion, use more ND and a slower shutter.
- In changing light (moving from shade to sun), consider adjusting the ND position between takes rather than mid-shot.
Image quality considerations with variable ND filters
Care, storage, and field durability
Who this kit suits best
Product options available (in stock)
FAQ
Does a variable ND filter help reduce choppy-looking motion in bright daylight?
Yes. In bright sun the camera often uses very fast shutter speeds, which can make motion look jittery; an ND filter reduces light so you can use a slower shutter and get smoother, more natural motion blur.
Which range should be used for snow or beach shooting?
Start with ND32–512 because snow and sand create intense brightness and glare. If the footage looks too dark, rotate to a lighter setting or switch down to ND2–32.
Why does the image sometimes look uneven or darker in one area at high ND?
At extreme settings, some variable ND filters can produce uneven density patterns. Back off slightly from the maximum, adjust the filter position, or switch to the other range to reduce the effect.
Recommended for you



Leave a comment